Perfect Gluten-Free Vegan Cherry Apple Pie
This gluten-free, vegan cherry apple pie recipe is a wonderful treat for folks who need to follow a gluten-free diet—or anyone who loves pie. The crust is crispy, flakey, and delicious. The filling is tangy with just the right amount of sweetness. I provide step-by-step instructions in the recipe below—but first, here are a few tips.

Gluten-Free Vegan Cherry Apple Pie Filling
The pie filling features 5 simple ingredients:
- tart cherries
- apple
- maple syrup
- gluten-free flour
- cinnamon
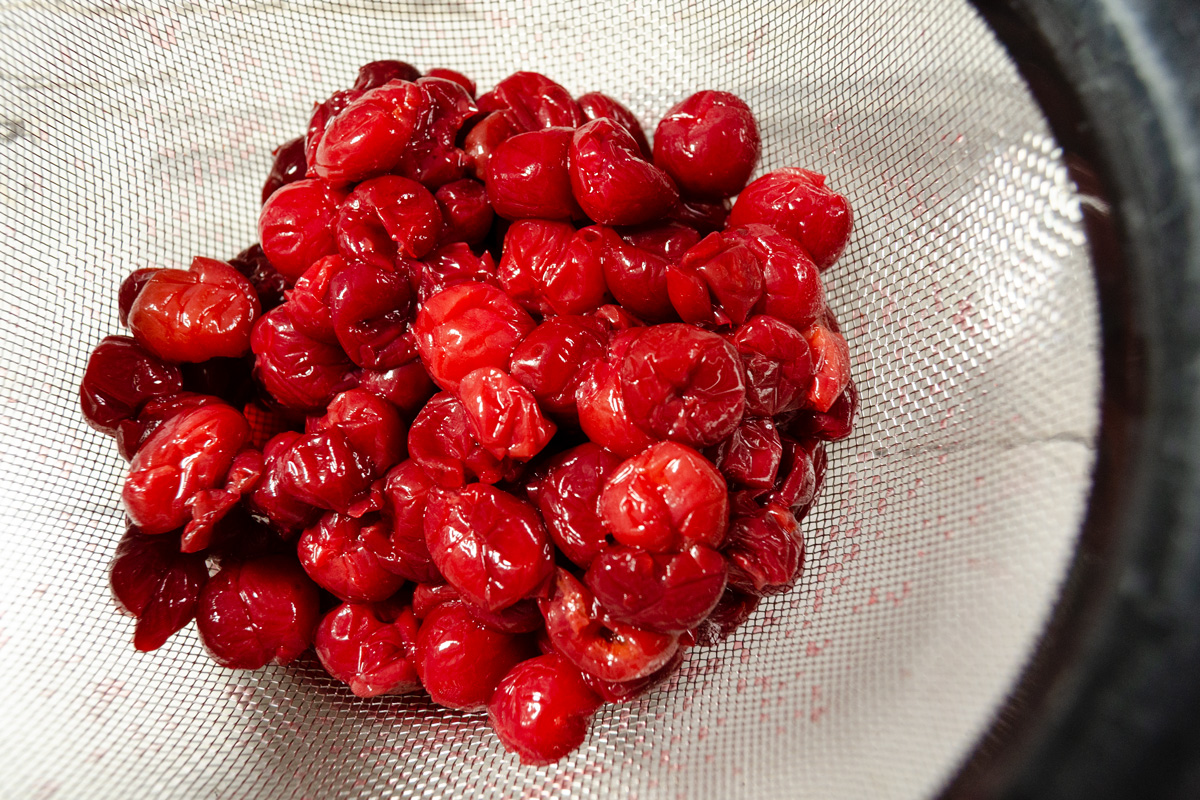
For convenience, I use frozen cherries. Because I’m not one for planning ahead, I usually end up thawing them in the microwave. Eight minutes at forty percent power—stirring every 2 minutes—does the trick. Then drain the excess juice.
I’ve learned the easiest way to peel an apple is to core and slice it first. Then, you can quickly peel each slice.
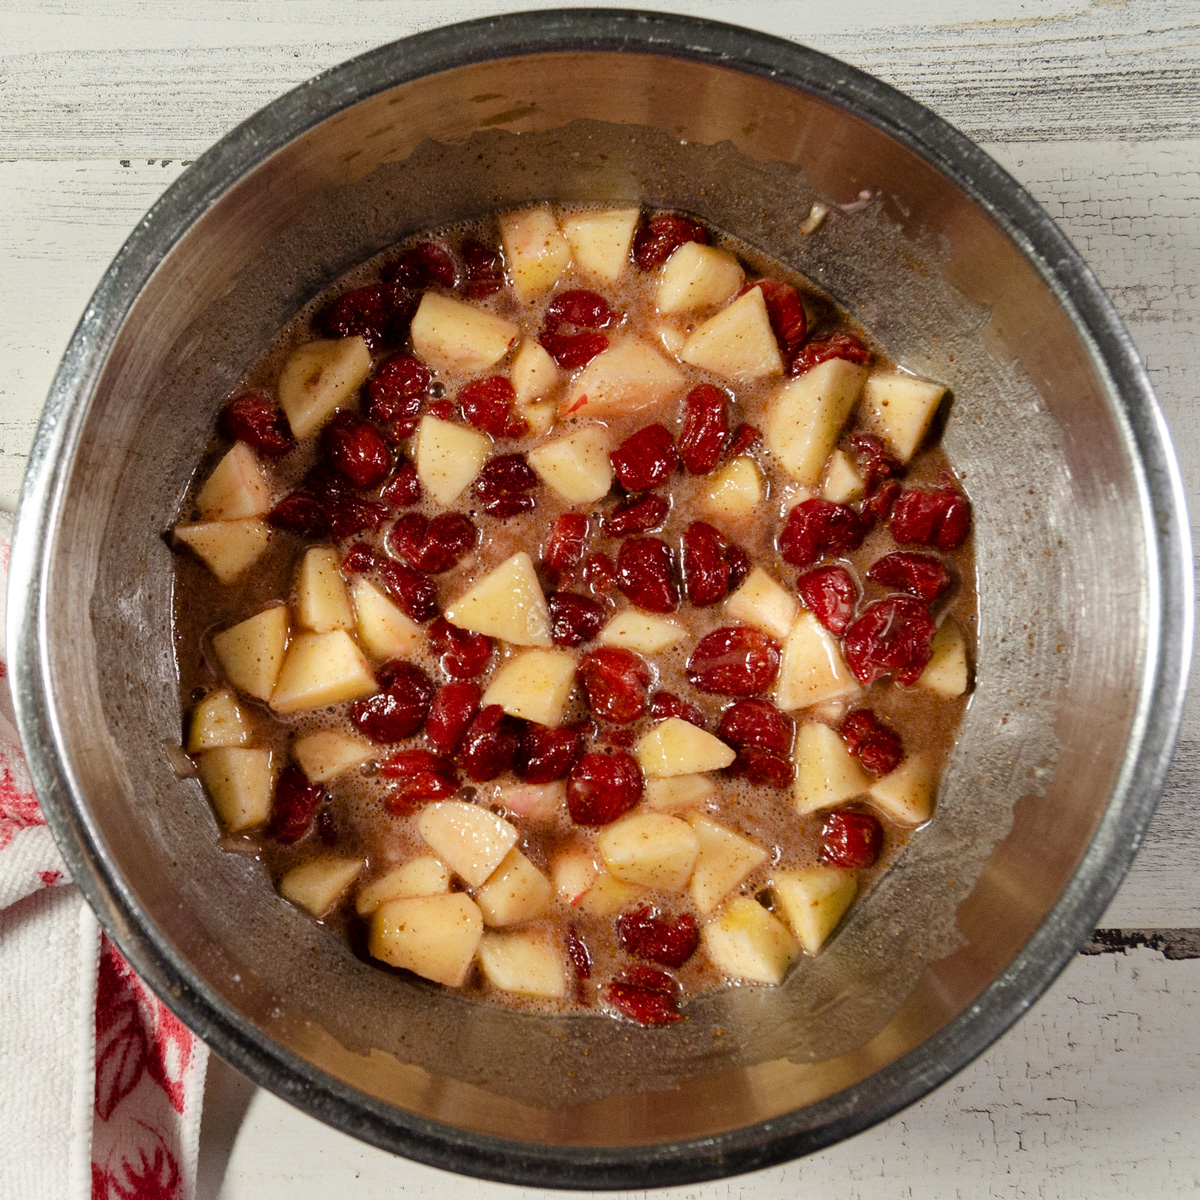
Apple pie usually features long slices of apple. In this recipe, you want to chop the apple into pieces that are about the same size as the cherries.

Once you blend all of the pie filling ingredients, don’t be alarmed by the liquid consistency of the mixture. It thickens nicely during baking.
How to make a gluten-free pie crust
The pie crust also features 5 ingredients:
- flour
- salt
- xanthan gum
- coconut oil (or vegan butter)
- cold water
The trick to making a gluten-free pie crust is in knowing how to handle the delicate pastry dough. Here is a quick time-lapse video that demonstrates the entire process.
First, you cut the coconut oil into the dry ingredients until the mixture begins to clump into particles the size of small peas. If you don’t have a pastry cutter, you can use a fork or pulse in a food processor to complete this step.

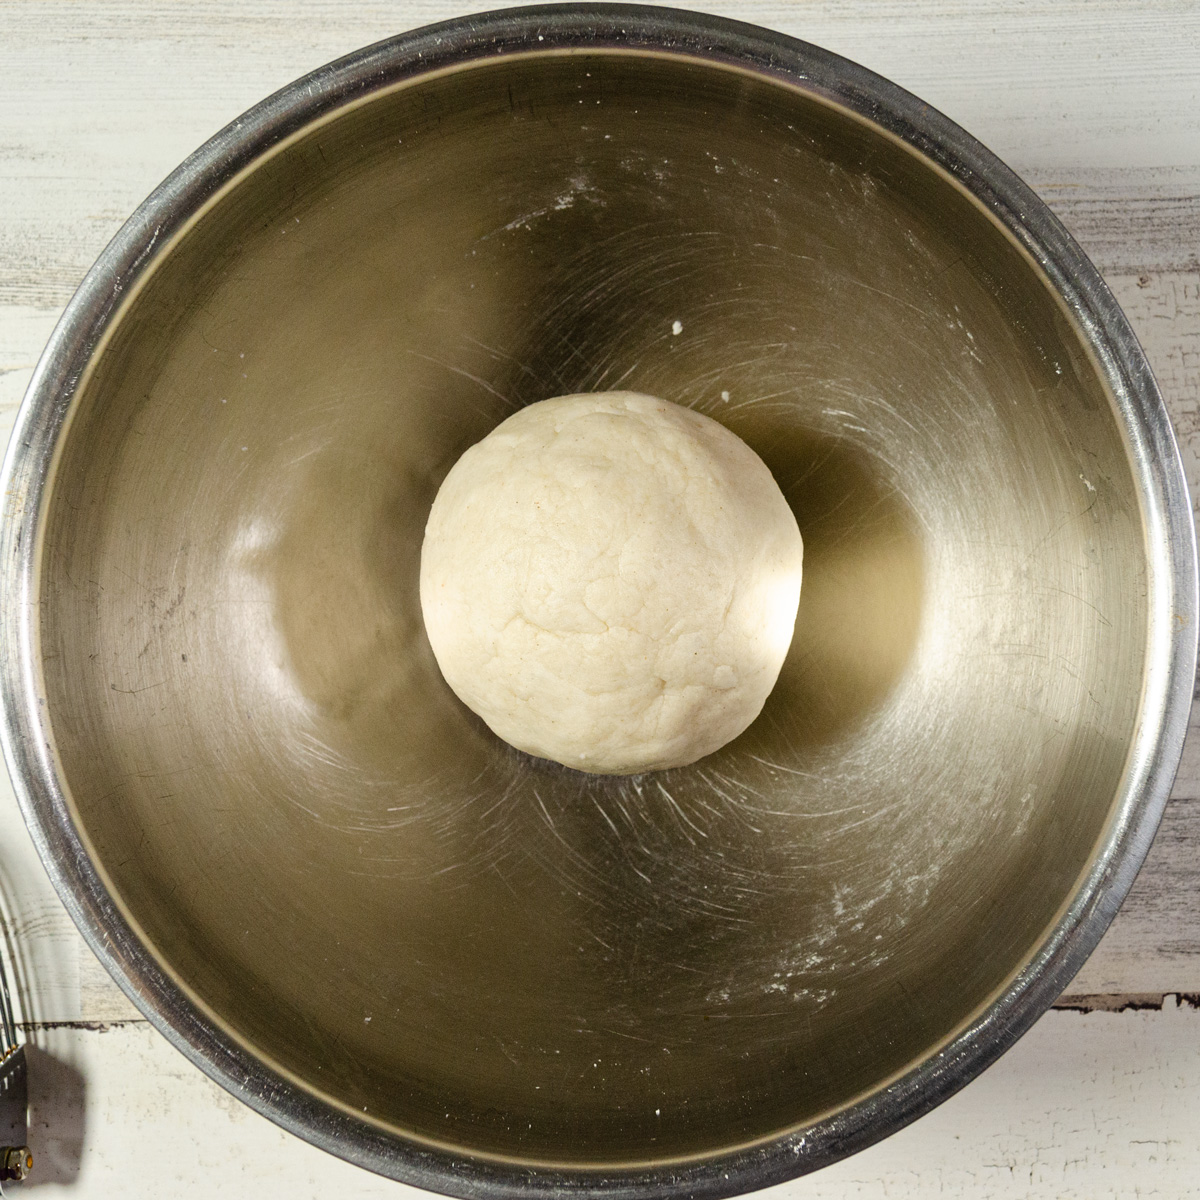
After you mix in the cold water, you will need to use your hands to knead the dough into a ball.
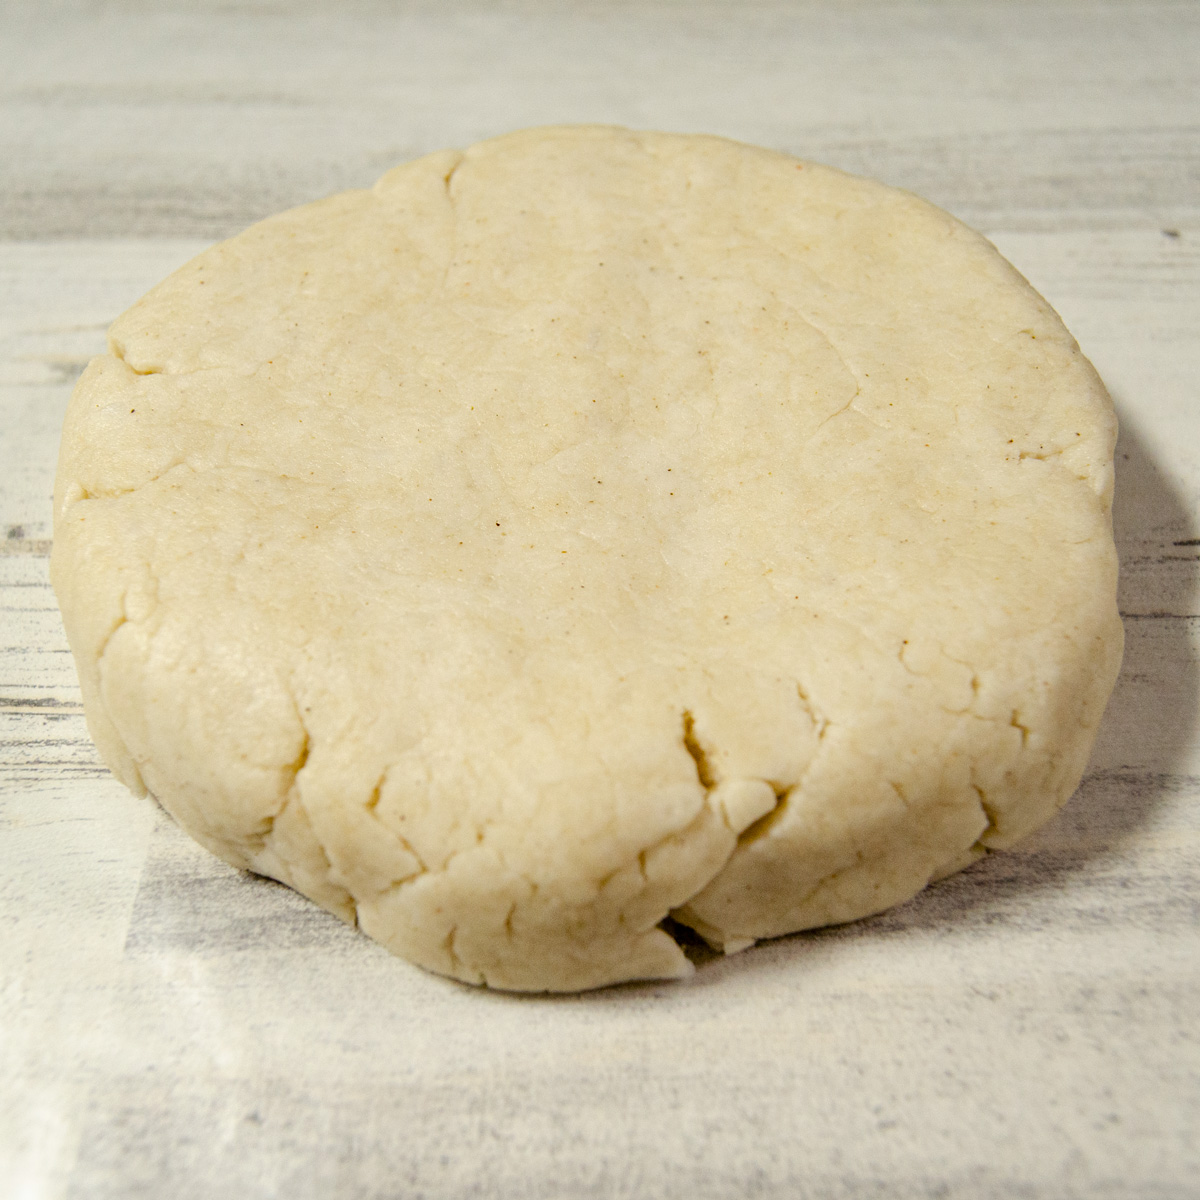
Then, slice the ball in half to make the bottom and top crusts. Since the bottom crust needs to fit in the pie plate, cut a bit off-center, so one piece of dough is a bit larger than the other.

Place a long sheet of waxed paper on a damp counter. (Wiping the counter with a damp cloth before you lay down the waxed paper will keep the paper from sliding when you roll out the dough.) Then, flatten the larger piece of dough into a thick round and place it on the center of the waxed paper. (Pinch to seal any cracks that form along the edges of the dough.)
Place a sheet of waxed paper on top of the dough, then use a rolling pin with light pressure to roll out the pastry until it’s about 2-inches larger than an inverted 9-inch pie plate and about 1/8-inch thick.

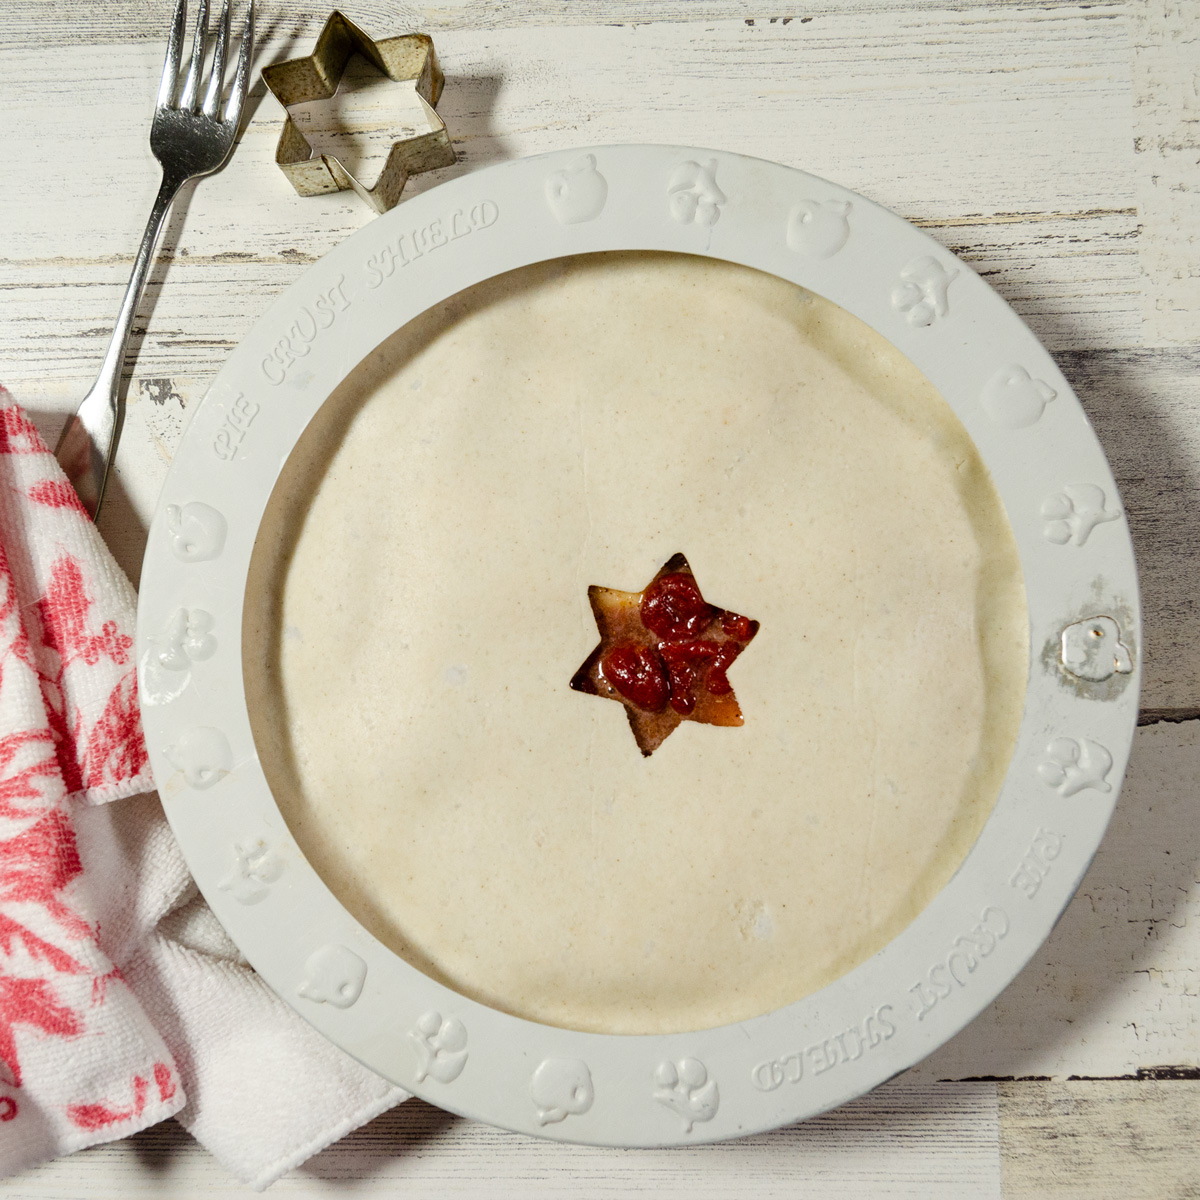
As per the instructions in the recipe below, use waxed paper to place the pastry in the pie dish. Add the filling and roll out the top crust. Use a cookie cutter to create a vent in the top crust before you place it over the filling.
Use a pie shield to keep the crust edges from browning too quickly. You can also wrap the edges in aluminum foil if you don’t have a pie shield—but this approach can be a little tricky. I recommend the pie shield.
Perfect Gluten-Free Vegan Apple Cherry Pie
Don’t worry if a few cracks appear in the crust while the pie bakes. It might not look picture perfect – but it will taste delicious. Isn’t that what matters?

Allow the pie to cool, then use a sharp knife to cut. The bottom crust can be a bit crispy – press down to make sure you cut all the way through.

Then, enjoy the fruits of your labor!


Perfect Gluten-Free Vegan Cherry Apple Pie
Ingredients
Filling
- 5 cups frozen unsweetened tart cherries
- 1 large apple or two medium apples
- 1 cup pure maple syrup
- 1/2 cup Bob's Red Mill 1:1 Gluten-Free Flour*
- 1 tsp ground cinnamon
Crust
- 2 cups Bob's Red Mill 1:1 Gluten-Free Flour
- 1 tsp Dr. Mercola Himalayan Sea Salt*
- 1 tsp xanthan gum
- 2/3 cups virgin, unrefined coconut oil
- 8-10 Tbsp cold water
Instructions
- Preheat oven 425º F
Filling
- Thaw and drain frozen cherries (I microwave for 8 minutes at 40% power, stirring every 2 minutes) – then add to medium-sized mixing bowl
- Peel and core apple(s) and chop into 1-inch pieces
- Add chopped apples, 1 cup maple syrup, 1/2 cup flour, and 1 tsp cinnamon to cherries
- Stir until flour is mixed in and then set aside
Crust
- Combine 2 cups of flour, 1 tsp salt, and 1 tsp xanthan gum in a large mixing bowl
- Add 2/3 cups coconut oil and use a pastry cutter to combine until mixture begins to clump into particles the size of small peas**
- Sprinkle mixture with 4 Tbsp of cold water, mix with pastry cutter, then add another 4 Tbsp and continue to mix until all flour is moistened and forms large clumps that almost clean the sides of the bowl (add an additional 1-2 Tbsp of cold water if necessary)
- Use your hands to kneed pastry into a ball
- Use a knife to slice pastry ball in two – making one side slightly larger than the other
- Place a large sheet of waxed paper on a damp counter (the damp counter will keep the paper from sliding)
- Use your hands to flatten the larger-sized pastry into a thick round – pushing in the sides to seal cracks
- Place flattened pastry in the center of the waxed paper and cover with another sheet of paper
- Use a rolling pin with light pressure to roll out the pastry until it's about 2-inches larger than an inverted pie plate and about 1/8-inch thick
- Peel top sheet of waxed paper off the pastry, then use the bottom sheet of waxed paper to lift the pastry and place it in the pie plate – then carefully peel the bottom sheet of waxed paper off the pastry (peel slowly – the pastry is delicate)
- Carefully lift edges of the pastry as necessary to push it down into the pie plate and use your knuckle to press the pastry into the shape of the plate – use scraps from the edges to seal any tears
- Repeat steps 7-9 to roll out the smaller pastry until it's slightly larger than the pie plate
- Remove the top sheet of waxed paper and use a small cookie cutter to remove the center of the pastry (have fun with the shape!)
- Pour filling into the pastry-lined pie plate and use a spoon to level the chunks of fruit
- Carefully lift the bottom sheet of waxed paper with the top layer of pastry and hold it vertical to line up the bottom edge of the pastry with the rim of the pie plate – then quickly place the top layer of pastry over the filling
- Carefully peel the waxed paper off the pastry and gently lift the edges of the pastry to tuck in slightly along the edge of the pie plate
- Use a knife to trim excess pastry along the edge of the pie plate – then press with a fork to seal the top layer of pastry with the bottom layer
- Cup your hands along the out edge of the pie plate to ensure the seal
Bake
- Cover crust with a pie shield (or aluminum foil) and bake at 425ºF for 40 minutes (remove pie shield for last 15 minutes of baking) or until crust is lightly golden and juices begin to bubble in cut-out
- Allow to cool before serving
Notes
Nutrition
Note: This page contains affiliate links. Veggie Primer may earn a commission if you use the links. I only recommend items/brands I use and trust.
Find more gluten-free vegan dessert recipes HERE!